Presto Change-o Shopping Bag! - Part 2
Continued from Part 1...On to Step 2! Bag Bottom Corners Next you're going to fold your bag bottom so that it lays flat like a triangle on one side- see the image below, or check out this video where Zac walks you through it.
- Take a ruler and find the spot on the hypotenuse/longest leg of the triangle (hello 10th grade geometry :)) that is 4.5" long.
- Draw a line directly on the fabric here with chalk or colored pencil. This will be your stitch line!
- Pin along the stitch line (either across like in the last example, or along, like below. Either way, be careful not to sew over your pins).

(Left) See how we folded the bag bottom to make a triangle? (Right) Find the spot on the triangle that is 4.5" long, and mark with a line to make it easier to sew. Then pin.
- Sew along your 4.5" long line.
- Repeat the above steps with the other side of your bag bottom.

Check Zac out! You could have also put your pins in going perpendicular to the stitch line. Just be careful not to stitch over them either way :)
Step 3 - Attaching the bag bottom to our tshirt/bag middle. We're working our way up!
- Turn your tshirt section inside out- this'll make it easier to put right sides together.
- With right sides together, match the side seams of the tshirt to the side seams of your bag bottom.

See how he matched the side seams, and pinned them right away? Then he moved to the rest of the shirt and pinned the two pieces together all around.
- Pin the two pieces together all around. If piece is a little bit bigger than the other, you can lightly stretch the pieces to work together (this is called easing the two pieces together).

Pin the bag bottom to the tshirt loop all the way around and then sew them! Our bag is getting bigger!
- After pinning the two pieces together, sew them. It doesn't matter where in the circle you start (I usually go for a side seam). Check out the video of Zac sewing here.
- Next, iron the seam open. Zac chose to iron on the right side of the fabric, but I usually go for the wrong side- that way if the iron is too hot any marks might be kept to the inside...
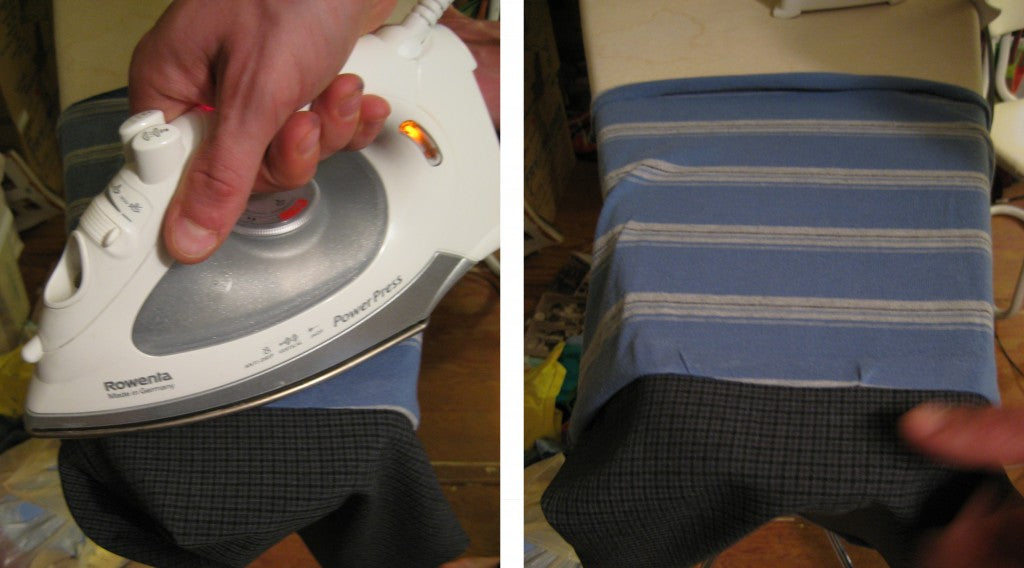
Iron the seam open so that where the middle and bottom section of the bag meet is crisp. Lots of sewing blunders can be covered up with a good ironing :)
Step 4 - The bag's top band!
- Grab your top band piece and start by folding it in half along the long edge (wrong sides together this time...) and ironing a crease in the middle.
- Next, unfold the band, and this time with right sides together, sewing the band along the short edge to create a circle of fabric.

Iron the bag's top band in half, wrong sides together, then with the right sides together and the band folded in half in the opposite direction, sew it up, making a loop.
- Next, iron the seam open, and then fold the circle back in half longways along your ironing line. Re-iron your original crease here. So pretty!

Iron your band's seam open, then fold it back in half longways and re-crease. Getting closer!
- Next we're going to attach the top band to the rest of the bag. It'll seem like this piece doesn't have a wrong side, folded in half the way it is, and that's kind of true. What we need to do is line up the band's seam with either of the bag's side seams, then pin the raw edges of the band (doubled like they are since it's folded in half) to the raw edge of the right side of the bag:

Zac has attached the raw edges of the top band (doubled) to the top edge of the bag, on the right side, with pins, all the way around. The folded side of the band is to the left.
- Sew, then iron open. Now your bag has a beautious top band! :)
Step 5 - Strappy straps!
- Fold each strap in half long ways and pin.
- Then sew along the long edge of each of the strap pieces.

The raw edges of the strap are on the right, and the fold on the left.
- Next, turn your bag straps right side out using a safety pin:

Next, iron them flat, and now we'll attach the straps to the bag!
Left photo: On our bag, we measured 4" from the side seam on either side and pinned each end of the strap to the bag (strap end on the inside of the bag so that it's hidden from the outside).
Right photo: We also folded under the bottom edge of the strap, towards the inside of the bag so that the raw edges of the strap were hidden.

Left: Check out where we pinned our straps- 4" from either side of the side seams (on both sides). You can pin yours wherever your want, just make sure to measure it so that they're even :) Right: See how we folded under the bottom edge of the strap?
Now we'll sew the straps onto the bag!

First you'll sew a box, then put a check in it. Watch Zac sew it in the video below.

And there you have it! You just finished your shopping bag! Kick butt! Please take a photo and post it over on my facebook page- I'd love to see what you did! And if you have any questions, don't hesitate to post below! Wooot! Great job! Banana cheers for all! Until next time, xoxo
Leave a comment
Recent Articles
© 2026 La Vie en Orange. Powered by Shopify